
Next: `Edit' menu Up: Reference Function List (by Previous: `File' menu
- Assemble HDR From Image Sequence... [Ctrl+Alt+A]
- Calibrate Camera Curve... [Ctrl+Alt+C]
- Spherical Harmonics... [Ctrl+Alt+H]
- Panoramic Direction Table... [Ctrl+Alt+P]
- Macbeth Chart... [Ctrl+Alt+M]
`Create' menu
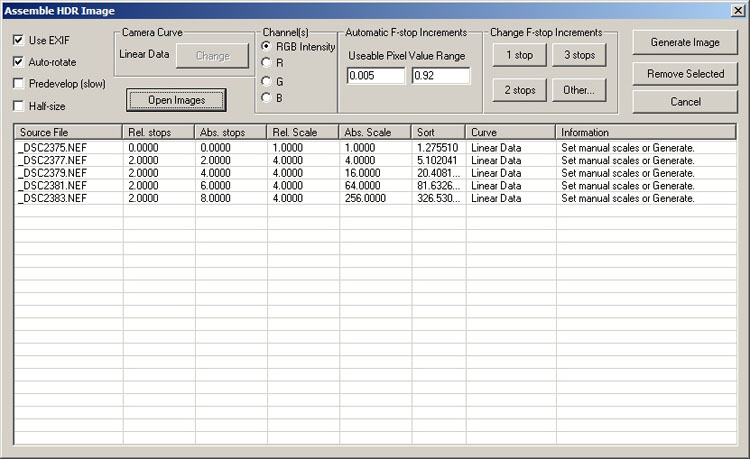
Assemble HDR From Image Sequence... [Ctrl+Alt+A]
See this
online tutorial for more detailed instructions.
HDR Shop v3.0 allows you to create HDR images from any LDR, HDR or RAW format using either image
pixel values or file metadata to guide the assembly.
Basic procedure:
Activate the tool from the menu or keyboard.
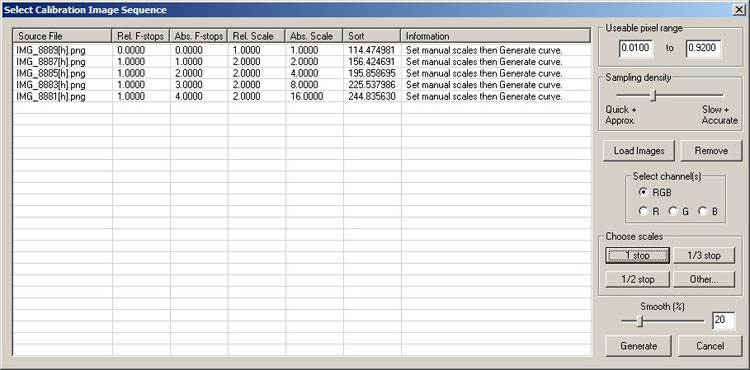
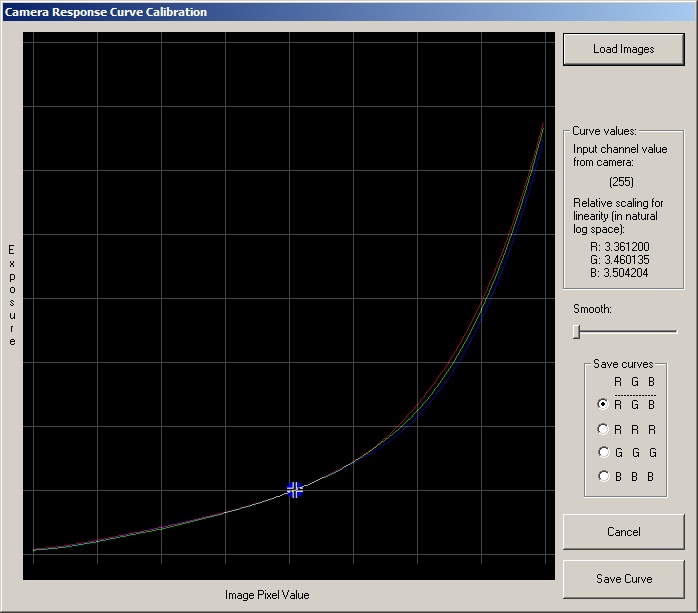
Calibrate Camera Curve... [Ctrl+Alt+C]
See this
online tutorial for more detailed instructions.
A digital camera sensor typically has a near-linear response to light within its limits, but in an effort to
make the images relate to photographic film images, the linear values are scaled in the camera according to
some non-linear mapping. When the LDR images are loaded in a typical image viewer it automatically applies
a fixed reverse response function (gamma correction) in order to make the values appear linear on whatever
display is being used. The camera curve calibration tool allows you to recover the non-linear mapping (
camera response function)
that was applied, using a sequence of images of a scene taken from a fixed viewpoint, requiring only that you
specify the relative exposure differences between the images in the sequence.
Basic procedure:
Activate the tool from the menu or keyboard.
Spherical Harmonics... [Ctrl+Alt+H]
Spherical Harmonic (SH) images can be used to calculate the lighting on a 3D model from area light sources in real
time. HDR Shop allows you to quickly create any SH image mapped into various panoramic formats. The dialog is
shown below:
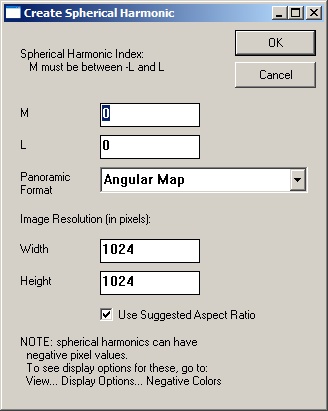
- Angular Map
- Mirrored Ball
- Mirrored Ball Closeup
- Diffuse Ball
- Latitude-Longitude
- Cubic Vertical Cross
- Cubic Horizontal Cross
Panoramic Direction Table... [Ctrl+Alt+P]
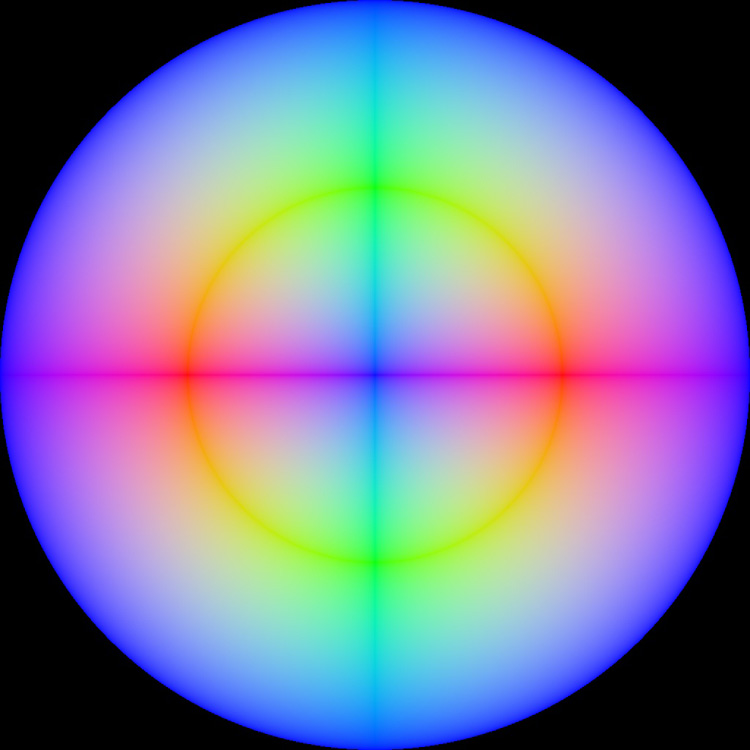
Create an image plot of unit-length 3D surface normal directions in one of various panoramic formats. A panoramic
direction table in the 'Angular Map' format is shown below:
Available panoramic formats (See this online tutorial for more information about these formats):
- Angular Map
- Mirrored Ball
- Mirrored Ball Closeup
- Diffuse Ball
- Latitude-Longitude
- Cubic Vertical Cross
- Cubic Horizontal Cross
Macbeth Chart... [Ctrl+Alt+M]
Create a small
Available reference color space charts:
- NTSC RGB
- sRGB (default)
- PAL RGB
- Colormatch RGB
- Adobe RGB
- Apple RGB
- CIE RGB
- WideGamut RGB
- SMPTE RGB
- Monitor RGB
- Best RGB
- Beta RGB
- Bruce RGB
- Don RGB
- ECI RGB
- Ekta RGB